Oil painting techniques: “Pink on the Street”

How do they DO that?
When you look at a painting, you often wonder, how did they DO that? I do! Do you ask yourself what oil painting techniques did they use to make it look like that in the end? Where did they start? What influenced their process? If so, I’m here to satisfy your curiosity. I’ll show you how I created this oil painting step by step, and discuss the thought process that guided my work.


A jolt of happiness
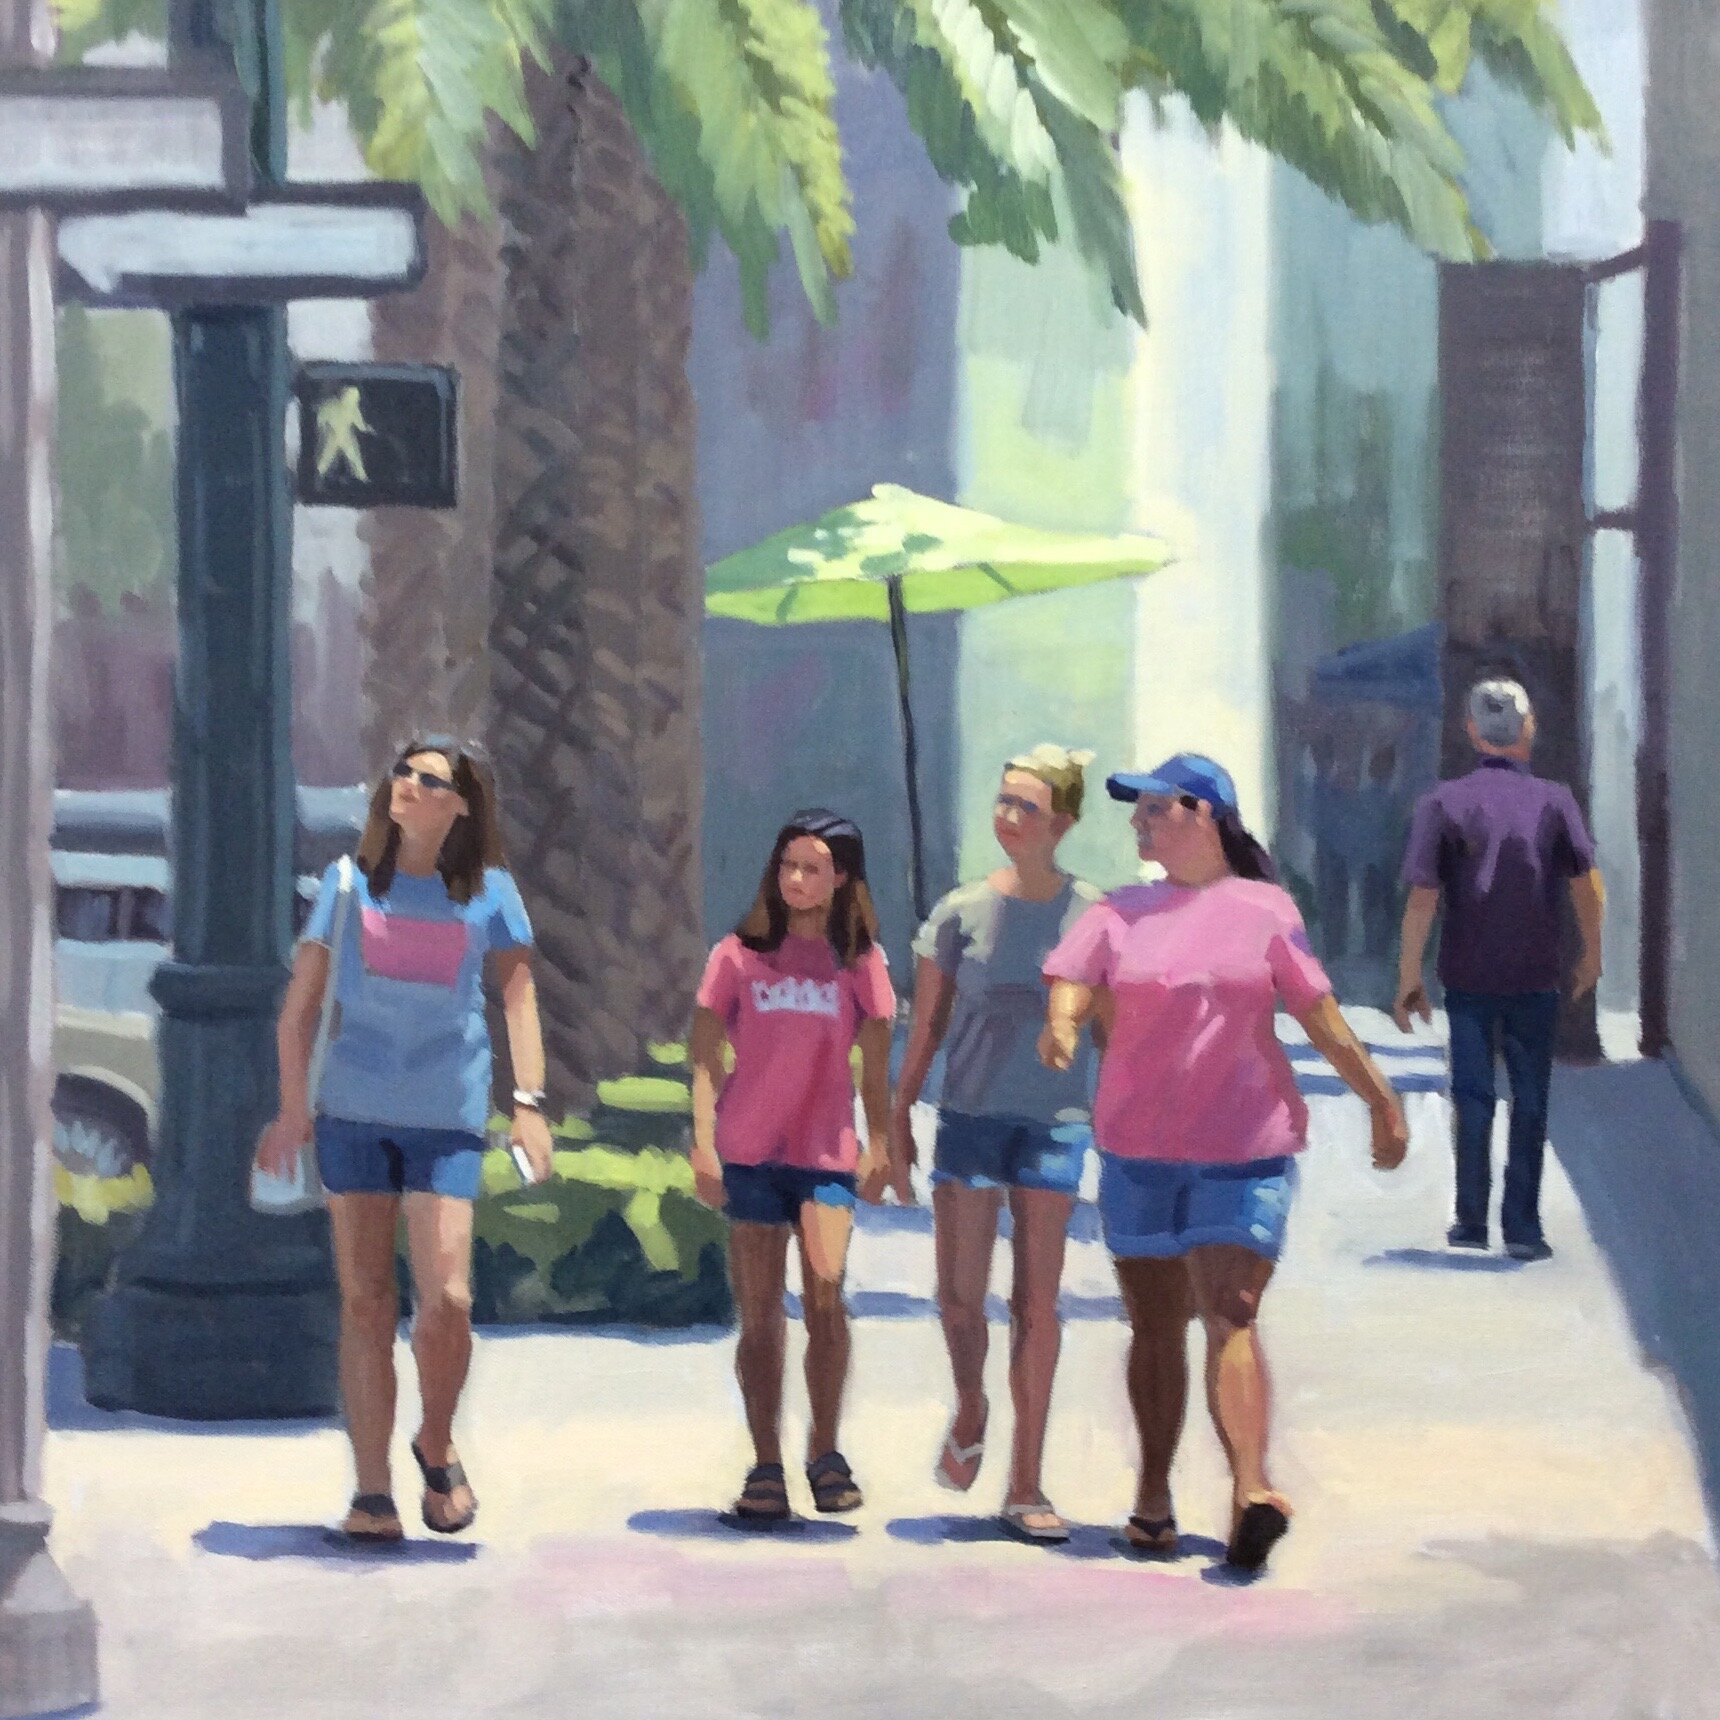
For me creating a painting starts with an image that gives me a little jolt of happiness. I took this photo on Central Avenue in St. Petersburg, Florida on a warm spring day. This group of women caught my eye because they seem to be enjoying the day and each other. This was my favorite photo because of the confident stride of the woman on the right and the connection between the women. I also liked their contrasting body sizes and shapes. I decided to include the man on the right to have an odd number of figures, which is always more interesting for composition.
On the right is my preliminary drawing on a grey tinted canvas canvas, based on my Photoshop editing of the photo. You can see I moved the man on the right to the background so he becomes a supporting figure, not the focus. I included the cafe umbrella and the street signs to give the viewer a sense of the location on a Florida street..


Value plan
Next, I lay out the values of the painting, simplifying the many values that I see into three; light (that I paint white), medium (which I leave the light grey of the canvas), and dark (which I paint dark grey). It’s the design of values in a painting that moves the eye around the canvas and plays up the focal point. I spend a lot of time working out a pattern so that the background supports the focus (the women) and adds to the story.
Once that’s complete I’ll start blocking in the colors, starting with the figures.


Oil Painting techniques
I start with the people because I want the colors of their skin and clothing to drive the color scheme.
Since I’m working loosely I can work wet-in-wet, laying down one stroke of color next to the last so that they blend a bit, or I’ll put color right on top of the first wet layer for even more blending.
I usually like to paint the entire canvas loosely before I move onto more detail. In these two images I’m completing the block-in and evaluating the painting as a whole.
I also find that I can’t work in any one area the day after I’ve applied paint. If I do I’ll be painting on top of a tacky surface; the brush tends to drag and the stroke looks ragged and uneven. It’s very annoying to work on. So the next day I’ll work a different area in the painting or another painting altogether.

Pulling it together
At this point I have everything blocked in and now I’m working to balance the areas of the painting in terms of color and value. In the view on the left, I’ve added some dark figures in the alley on the right, lightened the palm fronds, warmed the sidewalk, and gave the man more definition.
For the final painting I changed my mind and made the palm fronds a bit darker and warmer, refined the street signs and shrubbery, warmed up the tree trunks, lightened the area above the umbrella, and darkened the crossing sign figure.
Once I think I’m finished I’ll let the work sit in my studio and keep me company for a week or two. During that time I’ll glance at it from time to time to see if there’s anything that’s bothering me and to make sure the painting works as a whole.
There are usually a few things I end up changing that make me happier with the final result. Only when I’m sure that I’m finished do I varnish it and post it on my website and social media.
Then I take a deep breath and move onto the next painting. There’s always more to learn!